Sunday, April 28, 2013

[Sponsored: #8] ElishaCoy 3D Spin Cleanser Review

This review is proudly sponsored and brought to you by WishTrend. Any external images, if used, solely belong to their respective owners and not to me. I only re-link and use them as part of this review.


Note that all views presented here are of my own and whether the product is sponsored or not, it's honest throughout. Only that effects will vary on the individual when applied. This post is photo-heavy and features different facial cleanser types with this ElishaCoy 3D Spin Cleanser as well for reference.


WHAT IS IT: ElishaCoy 3D Spin Cleanser


THE PRODUCT(S):

ElishaCoy 3D Spin Cleanser: 360° in and out clean facial! Abundant bubble generated in 360° turning clean pores completely with low stimulus and removes unnecessary keratin so as to maintain neat and clean skin tone. Left and Right turn method enables reverse textural facial wash and texturial facial wash so that cleansing is available to the fine and curved area of the skin without skin damage.


This ElishaCoy 3D Spin Cleanser actually comes with a pamphlet in at least 5 different languages, mainly: Korean, English, Japanese, Mandarin & Thai. And I personally feel that it is a generous touch, as people all around the globe generally tend to want to use good products especially when it concerns the skin. So, having a pamphlet in these 5 different languages ensures that almost everyone can understand the instructions and usage.


No doubt I am rocking the instructions in English, and the instructions are so easy to understand, complete with illustrations as graphic demonstration.


Each ElishaCoy 3D Spin Cleanser actually comes with 2 AA batteries and get this, they do not charge you for the batteries. And I kind of understand the inclusion of the batteries too. You make a purchase and keep wondering when the postman will show up with your precious ElishaCoy 3D Spin Cleanser, and along the way, you will more or less forgot all about the batteries. Hence, WishTrend includes the AA batteries so that you can start using it as soon as the PostMan delivers it. Aww~ that's so sweet and thoughtful ❤❤❤


A close-up look at the ElishaCoy 3D Spin Cleanser itself. Note that there's only 2 buttons and despite looking a little on the "less button = less functional" side. It's actually easier to use with lesser functions. Who needs an ON button, an OFF button, followed by a Spin Left button and a Spin Right button, and so on and so forth? Good products should come as simple as it is, so that the user won't feel that it is a complicated process before even getting to use it for the first time.


And another look at the silicon pad underneath this ElishaCoy 3D Spin Cleanser ensures that your spin cleanser doesn't slip off any wet surface and taking an unneeded plunge to it's death from table-top to the floor. Even if we are really really careful, there will be unexpected moments when accidents happen due to splashes instead of elbow-induced. So, it's really nice of WishTrend to think up of the silicon pad for anti-skid purposes. And besides, my stuffs just loves to skid around when it thinks I am not looking :/


And the bristles, it's just so soft and gentle, it feels like touching a teddy bear. No, I'm not joking at all, the bristles are really gentle to the touch. Back during the early 1990s, I've had the unfortunate experience of buying something similar from the now-defunt One99 shop, for the low price of S$1.99 and the bristles were so hard and rough, I ended up using it only a few times before dumping it aside and promptly forgetting it's existence. However, with this ElishaCoy 3D Spin Cleanser, I practically end up wanting to use it more on my face than usual, even though my facial cleansing regime is strictly adhered to only twice a day. Yes, it's so gentle that it feels like a facial massage while my skin is being cleansed.


And the cleaner brush is actually detachable too, and this means that you can even use the cleaner brush on itself if you decided to use a facial exfoliator manually and feel that the spin cleanser itself might be a little too harsh. And at the same time, this also meant that I can pop it under the tap and wash the cleaner brush thoroughly clean of facial cleanser and cleanser suds too. All without having to fear that I might accidentally splash water into the machine inside the spin cleanser. Phew!


And here's where you pop in your AA batteries. Just pull off the silicon pad, pluck off the bottom lid and you can insert or remove your AA batteries. And obviously, I misread the +/- instructions a little off and inserted the batteries wrongly ^^; Took a few tries before I realized I plonk in the batteries wrong and I thought I had damaged it before using it for the very first time D:


The top button actually doubles up as the ON switch as well. And as you can see here, the green light meant that it's on a lower spin cycle and more suitable for someone who have sensitive skin and cannot afford to rub too hard on their skin. Heck, you might probably be able to use this on a baby too and the baby will probably think he/she is being tickled lol


And if you press the top button a.k.a ON switch once more, it will switch to red light. And red light is generally best used on normal, combination and oily skin to ensure that surface dirt and grime are better removed from the surface of our skin. And whether the spin cycle is on the lower or higher frequency, I would still like to stress that it is still just as gentle on the skin too. It's like what I've mentioned, facial massaging and facial cleansing all rolled into one.


Note that the bottom button is for you to rotate the cleaner brush clockwise and counter-clockwise for that full facial massaging effect. Bliss~


And I even purposely saved up my T-Zone Exfoliating Wash to give it a try. Despite the Exfoliating Wash having really small microbeads in it, I find that cleaning of the cleaner brush is just as fuss-free and doesn't even leave any microbead residue within the cleaner brush. Simply because the bristles are really soft and gentle, making cleaning it so easy and painless.


Here's a look at how the ElishaCoy 3D Spin Cleanser looks like when being used. It really generates suds and the gentle spinning doesn't even make my grouchy skin irritated at all. It's almost akin to going for a facial spa and massaging, but all in the comfort of my own house. And I almost kept the spin cleanser spinning away because I wanted to see more suds showing up :D


See how the top of the cleaner brush is full of suds? It really really generates loads of bubbles and I just love bubbles :D


VERDICT: Initially, when I first saw this ElishaCoy 3D Spin Cleanser from WishTrend, I thought that the bristles would be those hard and rough types, only difference is that it won't spin that fast so my skin won't be hurt or irritated. But I was so wrong with my initial perception, as this ElishaCoy 3D Spin Cleanser is the bomb and to die for. All it needs is just 2 AA batteries and it's good to go forth and bring you on a facial cleansing adventure that is so remarkably gentle with a massaging feeling, complete with 60,000 bristles that aren't harsh on your skin at all.


And I also noticed that I do not need to wet the cleaner brush too much at all, as long as I've splashed water on my face, I'm good. A general rule of advice, start on either side of your cheeks first as my facial cleanser promptly dive-bomb/spill away from the cleaner brush when I attempted to start on my forehead first. In other words, you need to first sud it up with the ElishaCoy 3D Spin Cleanser before moving the spin cleanser to your forehead. Besides, almost everyone starts with the cheeks first when they are manually cleansing their face, so, I think it doesn't make sense when I aim for my forehead first and don't ask why either. Manually, I start from my cheeks. Battery operated, I always head for the forehead LOL


And despite the spin cleanser looking like it's well acquainted in your bathroom, it's actually portable enough to bring along on a short holiday and the length starts from the tip of my finger all the way to the bottom of my palm. It doesn't take up too much space at all, just roughly the same size and weight as your android or iPhone. The only reason why it feels and looks bulky and heavy, is due to the box it came in. And you cannot expect WishTrend to just randomly dump it in an empty box and mail it out to you either, don't you? They took the trouble to ensure your very own ElishaCoy 3D Spin Cleanser comes fit and snug in it's own pretty box, that I personally can't help but keep admiring to a fanatical level.


Talking about bristles, I've mentioned that it has 60,000 bristles, didn't I? The bristles on the cleaner brush is actually rounded, instead of traditional straight-edged. Despite my backward thinking in the early 1990s that straight-edged is better, it hurts my skin just as much. However, with this ElishaCoy 3D Spin Cleanser and it's rounded bristles, it actually cleanses really gently, and reaches into pores easily, ensuring that sebum, dirt and dead skin cells are removed without so much fuss and pain at all.


And prior to using ElishaCoy 3D Spin Cleanser for the first time, I normally do my usual facial cleansing regime either manually with my fingers or those face cleansing brush that can be bought from Daiso. And most times, the surface of my skin feels and looks clean, however, I always doubt that my pores are thoroughly cleansed along the way. And no matter how small microbeads can get in exfoliating facial cleansers, another issue arises without warning. What if the microbeads are so small that it gets stuck in your pore(s), one bead in one pore specifically and you never ever know cos it's too small to be seen with the naked eye?


However, with this ElishaCoy 3D Spin Cleanser, I need not have to worry no more. No matter how small those microbeads are going to get, it will still get flushed out by the 360° rotating cleaner brush. And my nose, the bane of my daily procrastination that I love and hate all at the same time looks so much cleaner now that I've started using this ElishaCoy 3D Spin Cleanser. Prior to usage, my nose actually do look pretty decent since I spend a longer amount of time on my nose cleaning just to make sure that the pores on my nose are cleaned as thoroughly as I possibly can. Hence, my nose looks like it never had any blackhead issue at all. But close up, you can actually see it pretty clear. But after using this spin cleanser, I actually used my blackhead extractor less and less often and blackheads are significantly reduced.


VERDICT: ✓✓✓


WHAT I THINK: Although it's gentle, it is actually a heavy duty facial cleanser that neithers damage nor hurt or irritate your skin at all. Makes me wonder why I had gotten the One99 version in the first place?


WHERE TO BUY: ElishaCoy 3D Spin Cleanser can be bought from WishTrend for the affordable price of US$71.80, due to the weak USD against Singapore dollars conversion rate recently. But before you happily fork out that US$70+, hear me out first!!


ElishaCoy 3D Spin Cleanser Beauty Steal Package WishTrend currently have a sweet deal going on now. If you are the first 300 to get their Beauty Steal package, you pay only US$72 instead of the original US#120, and this beauty steal actually comes complete with:
  • Body (Machine) + Facial Brush (worth US$71.80)
  • Blackhead Brush (worth US$18.20)
  • Vita Capsule Cleanser (worth US$30)

This deal is almost similar to Buy 1 and Get 2 Free. And on top of that, from now until the end of 2013, use Voucher Code RFXLSCOZ during checkout to get USD$3.00 discount on your purchases. Can be used with other vouchers too. However, note that you need to spend at least a minimum amount of just slightly over USD$20.00 to utilize this voucher.


Go over to http://www.wishtrend.com/578--elishacoy-3d-spin-cleaner-blackhead-brush-vita-capsule-cleanser.html for more info on this awesome deal!!


ElishaCoy 3D Spin Cleanser Cleanser Test

Don't believe that you can use your ElishaCoy 3D Spin Cleanser on other different types of facial cleanser? Don't worry, here's a test run on 4 different types of facial cleansers I have at the moment. And it works perfectly, if you need to use specific cleansers for your skin type :D


T-Zone Exfoliating Daily Wash:


Garnier Pure Active Fruity Energy Daily Energising Gel Wash:


Tsaio Acne Cleansing Foam:


Kitoko Kalani Grapefruit Purifying Cleanser:


Tuesday, April 23, 2013

PVC Jacketing: Books Kinokuniya Style

Before I go on with this little guide, here's the lowdown on Books Kinokuniya's book jacketing. Initially, they started this service free for customers who bought books. It doesn't matter what type of books, as long as it is books. So, you have it, manga, comics, textbooks, recipe books, etc. Until a few months after working there, I and probably the company realized that customers are starting to find "loopholes" in the system and demanded that their magazines be jacketed as well. And the reason being that their magazine costs more than S$45, so they should be allowed to have their expensive magazines jacketed for free.


But the problem is that, it's not a book. But nonetheless, a really dumb but cunning and sly customer complained and QQ a lot about this free sytem, which she claimed that some of the magazines have really thick covers that is similar to a book. Which effectively make the magazine relegated into the Bookazine category, and since "Bookazine" has the word "Book" in it, it somehow qualifies as a book and hence it should be allowed to redeem free pvc jacketing services. (I'm positively sure it's a she as guys simply don't give a hoot about it. If it's free, they'll go for it. If it's not, then so be it. They won't drop dead from not having their books jacketed, which means they will treasure their stuffs more. Hence you see comic collectors with almost mint collection of certain out-of-print 1st edition items that other people do not have.)


And so, Books Kinokuniya decided to come up with the S$1 charge. Therefore, it doesn't matter whether it's a book, magazine or a bookazine anymore. As long as you are willing to pay that S$1, you are entitled to it. So essentially, if you have 10 items to be pvc jacketed, you have to pay S$10. If you have 100 books, then you have to pay S$100. You can get the drift there. It's not S$1 for any amount of items that you want to get pvc jacketed, it's S$1 per item to be pvc jacketed. And since because someone decidedly abused the system and made a free and complimentary service became a 1 for 1 paid service, here's the lowdown on how to do your own book/pvc jacketing Books Kinokuniya style.


Start with a book, you need a book to do book/pvc jacketing. Without the book in question, you cannot gauge how much plastic/pvc you need for it.


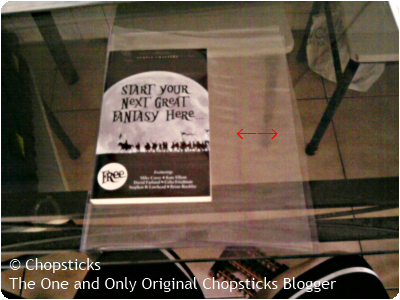
Use the book you have to measure out the amount of plastic/pvc you need, just don't be stingy. If you are too stingy with the flaps area, your book will just pop out of the plastic/pvc when you are trying to read it. But don't go overboard either, you need to be able to close and store the book away after reading it, instead of leaving weird marks inside the book itself.


Now that you've cut out the appropriate amount for your book, fold the flaps inside the cover of the book. If you need to, just unfold it and press it down with a ruler so the crease/line stays in shape and doesn't pop out of the book unnecessarily.


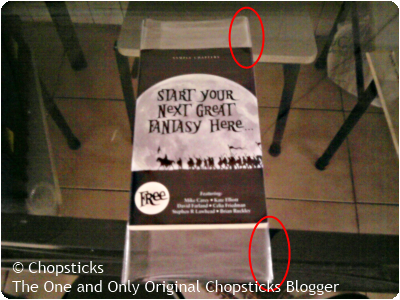
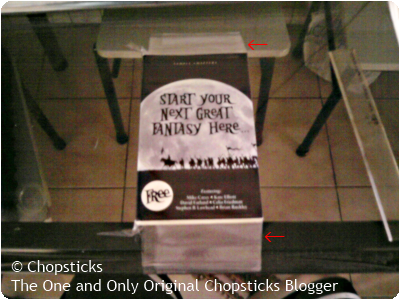
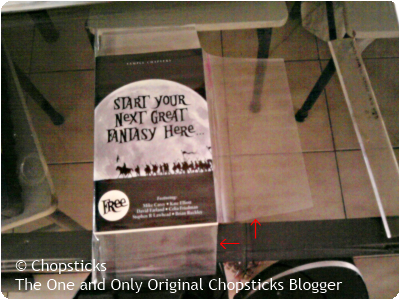
Now that you're done with the folding part, you need to cut off some excess plastic/pvc so that when you fold it, it looks "professional". Notice the red arrows in the image above, that's where you cut it off slantly. Just don't go overboard at all or your scotch-tape or adhesive/double-sided tape won't have enough space to stick on and it might tear the book.


If you refer to the image right above, you can see how I cut it. It doesn't matter whether it's paperback or hardcover with it's very own dust-cover attached, the method is the same. The only difference with the hardcover book that comes with it's own dust-cover is that, you need to cut it accordingly to the dust-cover itself, not the book.


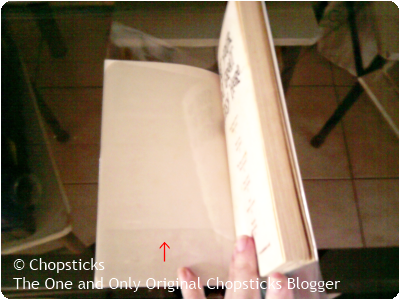
Now that you have turned a whole flap into 3 separate flaps, fold the bottom flap up inside the book itself, as seen in the image above. Again, you can peel off the plastic/pvc and use a ruler or something to firmly press the crease down.


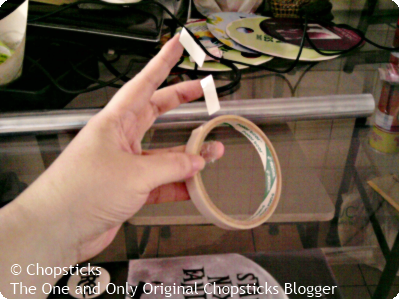
Now, go grab your double-sided tape. If you accidentially measure out the plastic/pvc too little, get the smaller one. If not, go ahead and get the fattest double-sided tape you have. The bigger means that the plastic/pvc will be even more secured and will not drop off without warning.


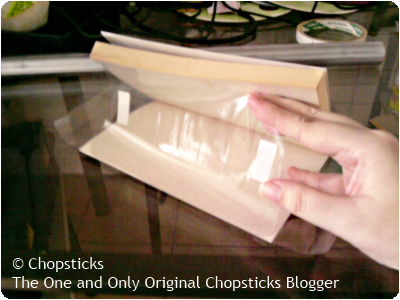
As seen in the image above, stick your double-sided tape on the innermost flap. Remove the white plastic backing and press down the outer-flaps onto the double-sided tape that you have applied on the innermost flap. Do the same on the front and cover, don't just do the front only lol


Now that you are done with the flaps on the front and cover, you would notice this 2 spine-wings on the top and bottom as seen in the image above. If you are jacketing a hardcover, fold it inside the dust-cover but outside the book. If it's a paperback, you need to cut it off. If you are someone who likes extreme precision, use a penknife or cutter. If not, just hold up the book and use a scissors instead.


Now that you've cut off the spine-wings, here's how the end product looks like. It's akin to a DIY book jacketing, but Books Kinokuniya style. This is the original Books Kinokuniya jacketing style, not sure if the current Store Manager changed it or not, although his preferred method is actually just as good too. But I'm a traditionalist, so I go with the original style.


And here's another look at the inner cover of the paperback, this is how the end result should look inside as well.


If you find this interesting, comment about it. But if you think it's still not clear enough, comment and let me know so I can decide whether to do a video tutorial for this as well :)


Thursday, April 18, 2013

Japanese Omelette Rice with Heinz Tomato

My love affair for Japanese Omelette Rice (a.k.a OmuRice) started when I bought my first OmuRice at Liang Court back when I was 18 years old. Despite the OmuRice being cold already, since by the time I bought it, it was already 8pm at night, I thought that was the best rice dish I've ever tasted. And for the next couple of years, I've tried recreating my own OmuRice, but it just didn't taste the same. Heck, it didn't even taste remotely like how OmuRice is supposed to taste. And I'm telling you, it was just pure agony for me. I did almost everything right but the taste just didn't quite measure up. It just tasted like something aliens will probably approve since well, it just didn't taste like OmuRice.


Until a few years ago, I chanced upon Heinz Tomato Ketchup. And I thought, "What the hell?" and bought my very first Heinz Tomato Ketchup and made OmuRice once more. And was I surprised at how close the taste was to the original I've eaten so many years ago. Heinz Tomato Ketchup have this sour-ness that actually complements OmuRice on a tasty level, something that I felt was missing from other different brands of tomato ketchup I've bought and tried before. If only I knew Heinz was the one, I would have hunted for Heinz specifically from Day 1, instead of having to feel that pain and anguish that made me think I suck as a beginner chef.


Yes, I know my recipes are really limited. But, it cannot suck to such an extent that a plate of Omurice just doesn't taste anything like OmuRice at all. And abruptly after finding Heinz made the perfect choice for OmuRice, I kinda lost interest in it as my ingredients for OmuRice was also limited as well. And so, another few sad and lonely years without Heinz went by, until I found myself a winner of 8 yummilicious (Yes, I invented the word "yummilicious" first on this blog many years ago! Others are just plain old copycats :D ) and my fervor for OmuRice came back once again. And I also realized, you can mix and match the ingredients in OmuRice and make it into your very own OmuRice. Just don't omit the rice please, it won't be OmuRice anymore if there's no rice in it.

And now, here's my take on my all-time favorite OmuRice:


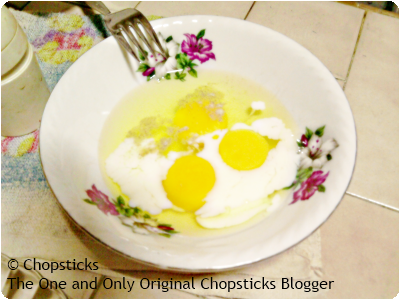
First of all, you need eggs to make the "Omu" in OmuRice a.k.a Omelette Rice. I sometimes adore eggs to a fanatic level, so I am using 2 eggs here. I've also added pepper, salt and cold milk as milk actually makes the omelette "creamier". Now, beat the hell out of those eggs and set them aside. And let's face it, that's the only time you shall be allowed to crack the "Bad Chef Beat Eggs" joke. If you do not like eggs or feel that it will be too full, go ahead and skip the eggs. Those eggs will probably go "Phew!"


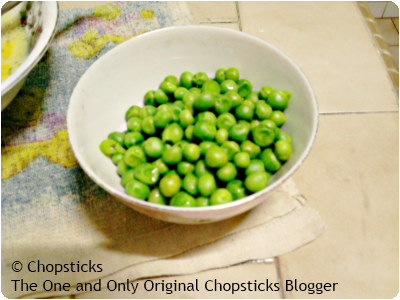
Next, I got myself some peas ❤❤❤ i just love peas, they're so round, and little and green and I wish every dish must have mandatory peas involved in it. Peas~

Best boil them in water first, to soften them. In this way, you need not cook too long with it.


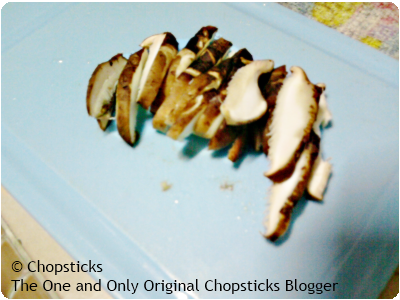
Sliced mushrooms, mine's regular mushrooms. I don't really think there's a limit on what type of mushrooms are best suited for OmuRice, just stay away from the fungus types. Those are mostly for soups...

Same with the peas, boil them with water to soften first to avoid having to cook them for too long.


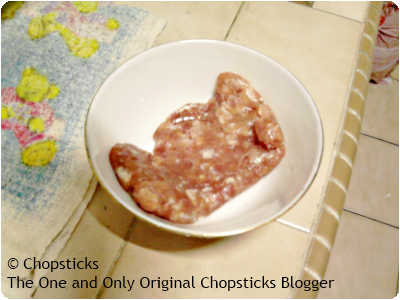
Meat. Any type of meat can be used actually, if you like chicken, go chicken. If you like beef, get them beef. If you like fish, erm, leave the fish at the side, don't cook it in. Fish inside OmuRice may be a tad nasty for some of us. You can actually deep-fried your fish and place it beside your OmuRice as a side dish instead. *mumbles* Where did that fish pop out from??


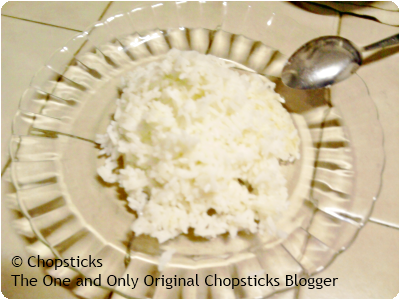
Rice. Of course you need rice, where did you think the "Rice" in "OmuRice" came from. Doesn't matter what type of rice, what brand, as long as it is rice. You can try cous cous, just make sure your cooked rice isn't wet and soggy at all. Wet and soggy rice are just as nasty too :/


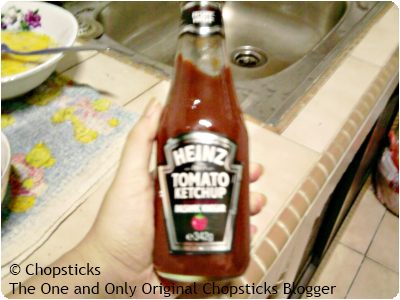
And not forgetting my new beloved hero, Heinz Tomato Ketchup with Balsamic Vinegar. I cannot stress how perfect Heinz tomato ketchup is, as a necessary ingredient for OmuRice. With Heinz, you don't actually need too much salt nor pepper for flavoring as the tomato ketchup is already flavorful enough on it's own. *mumbles* My Precious...


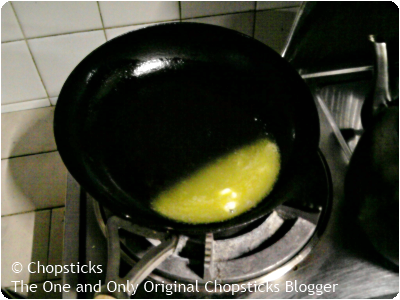
Now that you've got all the necessary ingredients pat down, you can start preparing to cook them. If you prefer something else other than peas, meat and mushrooms, go ahead and switch them. But first, you need butter, preferably unsalted and low cholesterol version. Using butter actually gives your OmuRice that rich and creamy flavor that it deserved. Melt that butter in your saucepan over medium heat.


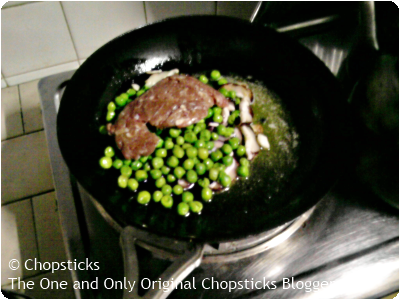
Now, you dump in the peas, mushrooms and meat into the melted butter and commence doing the pre-Heinz dance over the stove. Kidding! Just stir them until the meat looked almost well-cooked.


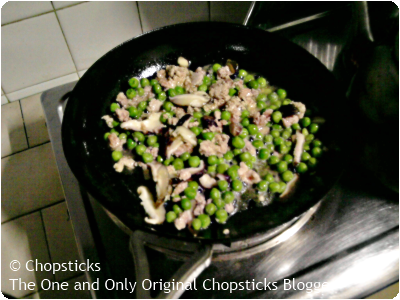
And now that, they're almost well-cooked or if you're off by a little and it turns out cooked, so be it. At this point, the peas and mushrooms should already be cooked at least, after their hot water bath.
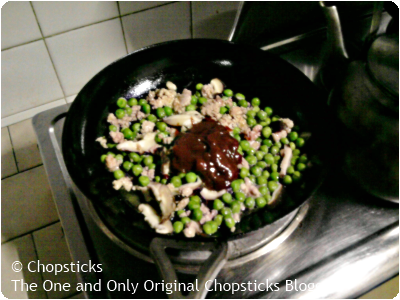
Pour a generous amount of Heinz Tomato Ketchup onto your coooked meat, peas and mushroom. Pour more if necessarily, as you will find that you need not add salt at all, maybe just a pinch of pepper to taste. Stir it until your Heinz Tomato Ketchup is thoroughly mixed with your meat, peas and mushrooms.


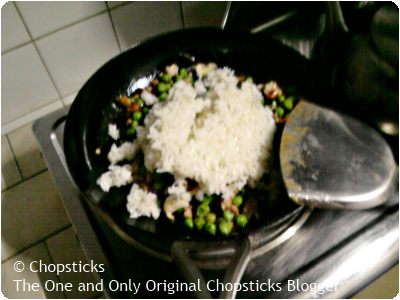
Now that the rice is cooked, go ahead and plonk it into the saucepan and stir that rice until it is a pretty orange-y and reddish color. Evenly please, or it's going to be weird having mouthful of Heinz Tomato rice with plain white rice fighting to win over your tastbuds.


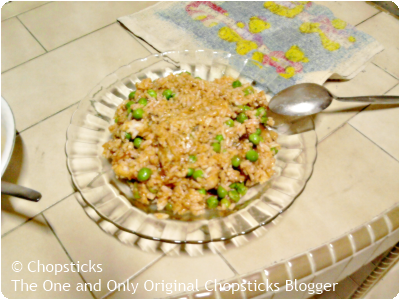
And this is how your OmuRice with Heinz Tomato looks like when it's finally done. If you want eggs a.k.a Omelette, go ahead and cook them. If not, just skip the eggs in the beginning.


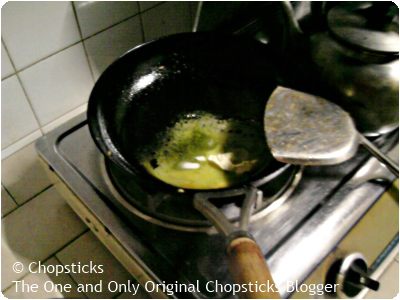
Again, melt butter in your cleaned saucepan. As using butter instead of oil, will give the eggs that creamy and rich flavor.


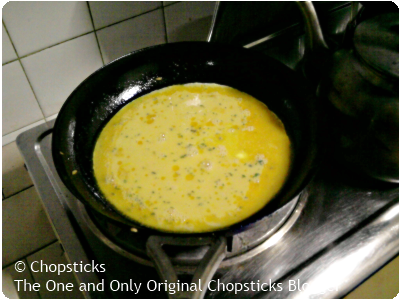
Pour in your beaten and flavored egg into the saucepan once the butter melts. Anyway, I suck at making omelette, so I stick with my usual scrambled runny eggs instead.


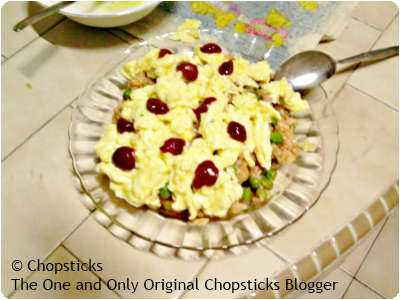
Once the egg is cooked, pile it on top of your OmuRice and go wild with Heinz once more. I prefer adding dots of Heinz to make it look like a Heinz Food Art item before devouring it.